Monday, March 26, 2012

Week 20 - The Elephan-Top

DSC_0393
Here I am at 20 weeks. The bump is growing, the boy is starting to be more and more active. And the sewing fun has started... When I first saw that lovely elephant print on jersey I knew I had to buy it. I love everything about it: the combination of colors, the floral elements in the design and of course the beautiful elephants. I couldn't decide right away for what to use it, I wanted to wear it right now, but I didn't want to waste the beautiful print on a maternity shirt that I might only be able to wear for a short time. So one day I was looking for something in my shirt drawer and I found an old worn out beach jersey tunic, that I loved and I remembered wearing at the end of my first pregnancy when spring started and I had nothing else to wear after a winter pregnancy with only a couple of ultra-warm maternity sweaters. So that seemed like the perfect project for my lovely elephant knit!

DSC_0395

The tunic is really a simple construction, perfect to show of a nice print and I love the bold solid strips. I added the faux layered look (the solid blue strip on the bust piece between the triangle...). The original tunic basically required you to wear a top underneath for modesty, but with the integrated layer that is now not necessary (yeah to one layer less to wear during a hot summer ahead!) and at the same time this converts the tunic to a nursing shirt!  Because the triangle is cut so deep the tunic enables easy access for nursing. The solid blue layer is a simple rectangle of fabric which is only attached to the sides of the tunic and the bottom middle - so it can be pulled aside easily for nursing.

DSC_0392
I also added a pleat to the front  to create more space for the growing bump. I really love this tunic, it's so comfy to wear and looks nice, too. Actually I am looking for more nice jersey print to make one or two more... Any suggestions for a cute print?


Monday, March 19, 2012

Week 19 - Spring Ruffle Top

Here is my take on Rae's Spring Ruffle Top (without ruffles though...) I made it just before the winter came and wore it once... which is why I haven't shared it until now. After the wash it was shamefully burried in a drawer with nice warm sweaters. So now that spring is here and I am pregnant I thought it's time to share this top that's so perfect for maternity wear!

DSC_0379
It is made out of an old vintage sheet (fancy fancy... I thought I do a test version first) but you know how these things are... it's not perfect but I love it, so I wear it. I love the green tone of the sheet and I have used some of it in different projects (here or here.)

DSC_0381
And since we are talking about Rae's spring top, there is another spring top sewalong going on right now! Check it out!

Friday, March 16, 2012

No Sew Kids Craft Apron

This is technically not really an apron more a general cover-up, but it's a 5 minute T-shirt recycling project that will keep your toddler's clothes clean from glitter, glue and paint! It could be the perfect (and way cheapest!) solution for a playgroup, Preschool, Sunday school or any other toddler (group) doing crafts. I know there are really cute crafts apron pattern out there and also tons of cute fabric, but really how much time and money does one invest in something that will only get dirty and spilled on, especially if you have to make 20 or more?

DSC_0368
All you need per apron:
-one old men's T-shirt in size M or L (XL might so huge that you'll actually have to sew it smaller)
-two 15 cm/6" pieces of 1/4" elastic

You'll also need a pair of scissors, 2 safety pins and a few minutes of your time.

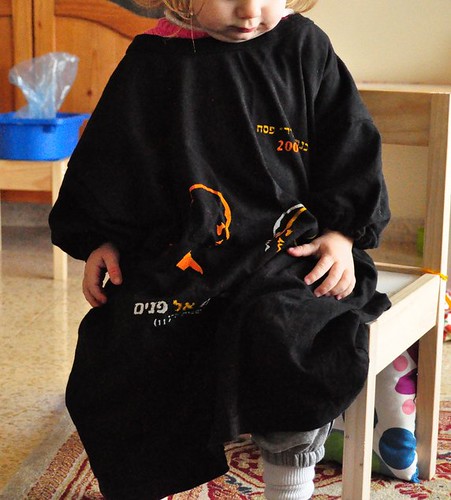
First get your toddler and hold the T-shirt up on him/her to check if the size is good. The T-shirt's width from sleeve to sleeve is about the same as your toddler's wrist to wrist measurement. Most likely a M or L will fit any toddler, XL will probably be to big and you'd have to sew the sleeve a bit shorter but I won't go into that here.
DSC_0355


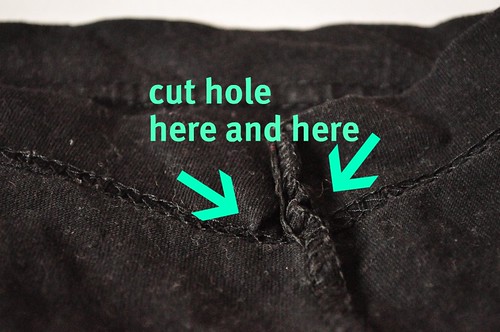
Turn the T-shirt inside out. Find where the seam meets the hem on the sleeve. We'll use the folded hem as casing for the elastic. To do this you have to cut 2 small holes through the inner layer of fabric (the folded bit on the hem), one hole on each side of the seams, but make sure not to cut the seams open. (see pictures below for clarity).
DSC_0344
DSC_0345


Pin one end of the elastic to the sleeve using a safety pin. Attach the second safety pin to the other end of the elastic and insert into the casing, all the way through. The sleeve will start gathering up a lot, that's why we pinned the one end down so it won't slip through.
DSC_0347


Now you should have both ends of the elastic next to each other peaking out of the holes like this:
DSC_0349

Tie the two ends of the elastic together with a double or triple knot (or sew the two ends together, but hey, this is a no sew project!); and remove the safety pins. That's how the finished sleeve looks like:
DSC_0343

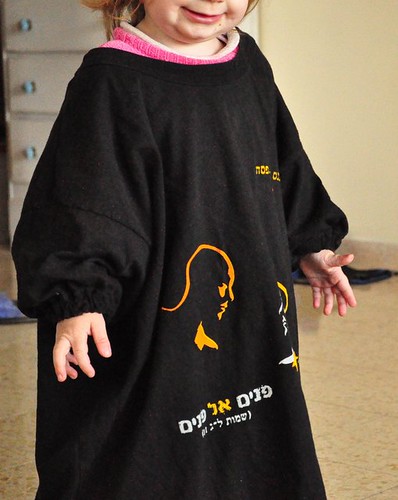
 Repeat on second sleeve. Turn the shirt right side out and put on your toddler to see if it fits. The sleeves should be snug around the wrist protecting any other shirt underneath from getting all dirty. The shirt will be pretty long on the toddler, protecting his/her pants, knee-length is the best, protecting most of the clothes but not getting in the way of the little feet. Most likely you can just leave the shirt as is, but if it's way to long cut off a bit from the bottom. And you're done!

DSC_0362
Now put the shirt on your toddler and start the crafty fun...


Thursday, March 15, 2012

Gingham in a circle...

DSC_0336
Did you ever wonder how a gingham weave would look like in a circle? I was playing with this in my mind for a while but it was time to do a little weaving project to make it visible for you...
The circle is really small, so the wool is sort of bulky in the middle and the whole thing is not laying flat, it's not finished properly but who cares?! The only purpose for this little project was to show you the gingham in the circle... I really love how it looks like and I can totally see this in a bigger project maybe one of those T-shirt yarn hula hoop rugs that I spotted on pinterest:
DSC_0335


My tiny Gingham test version actually looks like a mini-Kippah and I might just use it as that for our baby boy!

Monday, March 12, 2012

Boy, oh Boy!

boyohboy

We are expecting a boy! I am currently 18 weeks pregnant, so that's almost halfway done, yeah! I was blessed to have no sickness at all this time, I only was really really tired, but after a few days of springy sunshine that's all over now! I am totally excited, because really, this is just two new sewing adventures ahead of me: Making some of my own maternity clothes and sewing for a boy! Since it's a summer pregnancy there are just tons of options for nice maternity tops, skirts, dresses etc... My brain is already going wild for a while now and I couldn't wait for the bump to finally appear, so I can start dressing him up! I've got a pile of most pretty fabrics on my sewing table and my sketch book is getting filled with random pattern drawings... I think of posting one maternity project a week from now on and I'll see how far I get. (I don't think I'll make new maternity clothes in week 39...) But if you're pregnant and like to sew or would like to make your own maternity clothes some day, check back often!

Related Posts Plugin for WordPress, Blogger...