Saturday, November 3, 2012

Preparing Salad

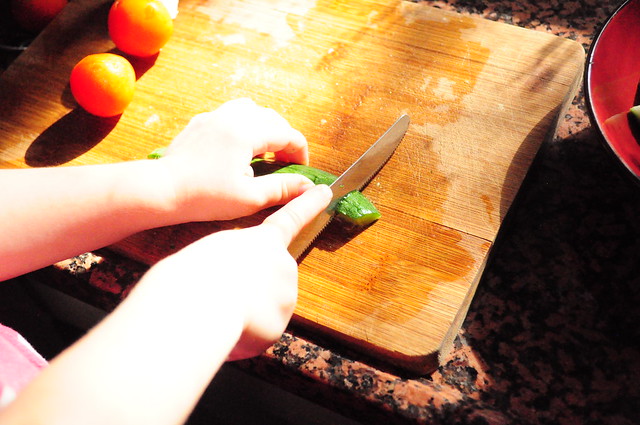
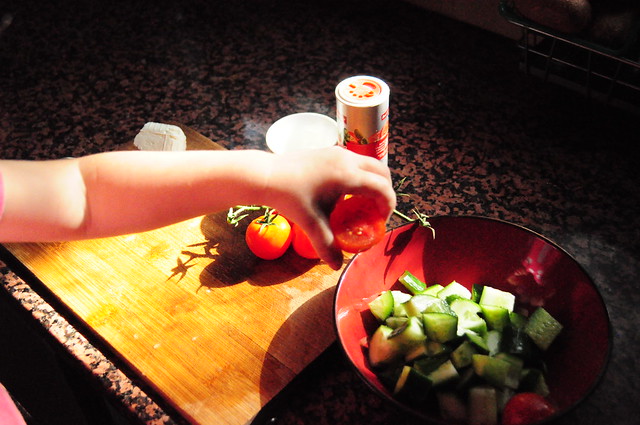
so...while I still try to cope and adjust to life with 2 children, my 2 1/2 year old daughter is taking care of us ;-) she is really into "helping" with all sorts of chores around the house. And lately she is asking almost daily to prepare "salat katan" (=a small salad). She can do it (almost) all by herself. I usually stay close by just to make sure she won't jump off the chair with the knife in her hand. She is really careful when cutting and so far only cut herself in the finger once.

This is how I set it up:
DSC_2025


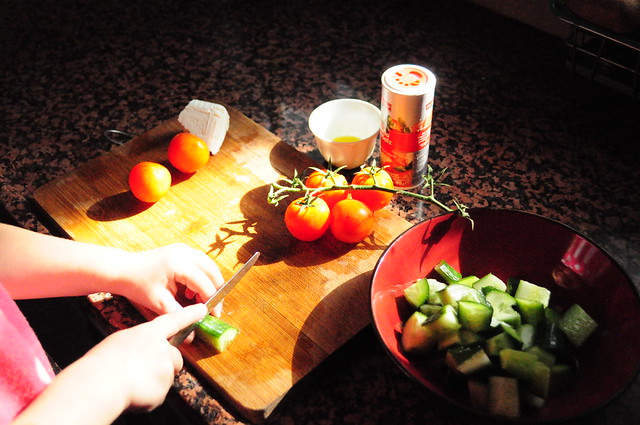
I put a small amount on olive oil in a small cup.
I have an all natural spice mixture for this salad and I open the shaker on the smallest hole.
A piece of feta cheese, washed cherry tomatoes and cucumbers pre-cut in long sticks.
And of course a cutting board, knife and bowl.

And here's how she prepares the salad:
DSC_2034
See how well it works to cut the cucumber sticks into smaller pieces?!
DSC_2031

DSC_2039
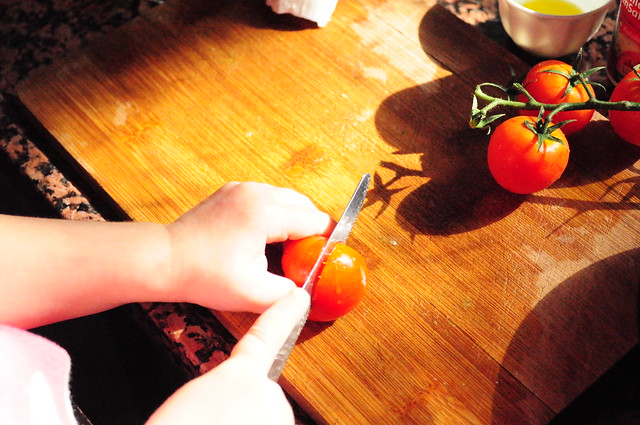
and onto the tomatoes
DSC_2038
they are more tricky because they are round...
DSC_2040
but she can do it
DSC_2035
and put it in the bowl.
DSC_2043
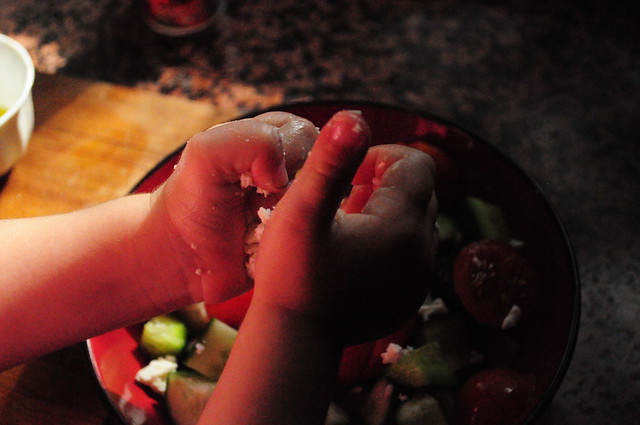
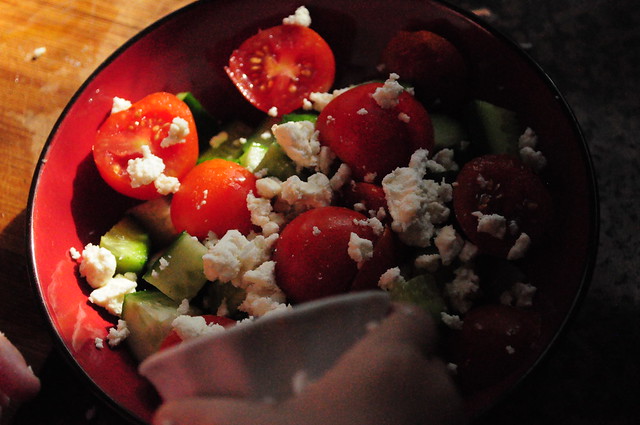
than crumble the feta cheese
DSC_2047
pour the olive oil (I tried before to let her pour it from the bottle, but she wouldn't stop pouring because it's so much fun. expensive and very oily fun.)
DSC_2049
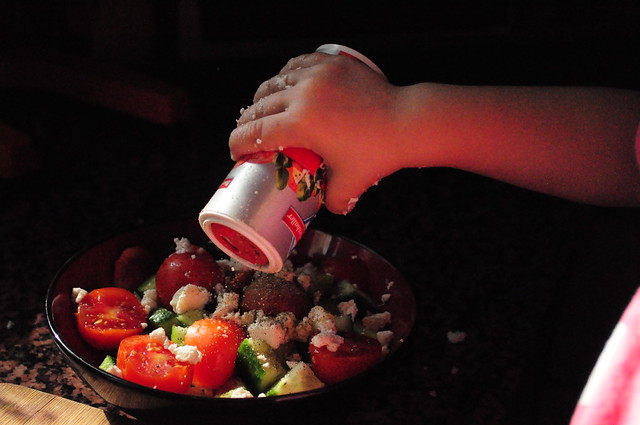
and add some spices... you see why it's necessary to only open one of the smallest holes.

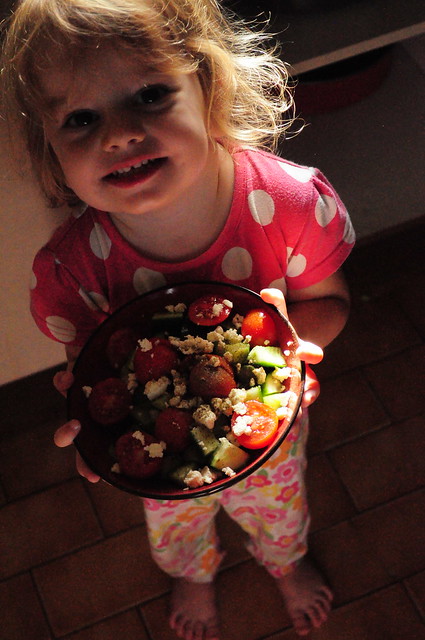
my little cook
one proud little cook with her delish' salad

never mind we are still in our pajamas and have a bed head... after all it's saturday morning ;-)

(sorry for the strange exposure in the pictures... the early morning light in our usually dark kitchen makes for hard photography conditions.)

Wednesday, October 17, 2012

OMG - 2 Months Old Already!

shsh, and not even been introduced here yet...

Mr. cheeks! A Happy little fellow. well, not so little actually. he started wearing 6 months PJ's at 6 weeks C.R.A.Z.Y. he is so tall!

DSC_1902


not much time at the moment to sew around here, but after following some of the KCWC I really want to get back to making some cute kiddie clothes!

Friday, August 31, 2012

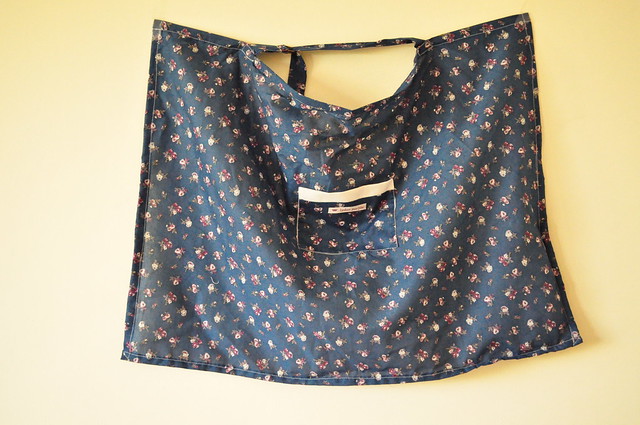
Nursing Cover

Take a simple square piece of fabric.

nursing cover

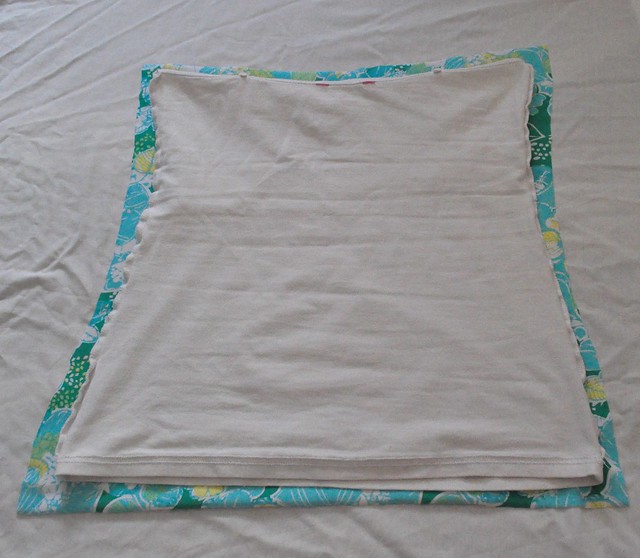
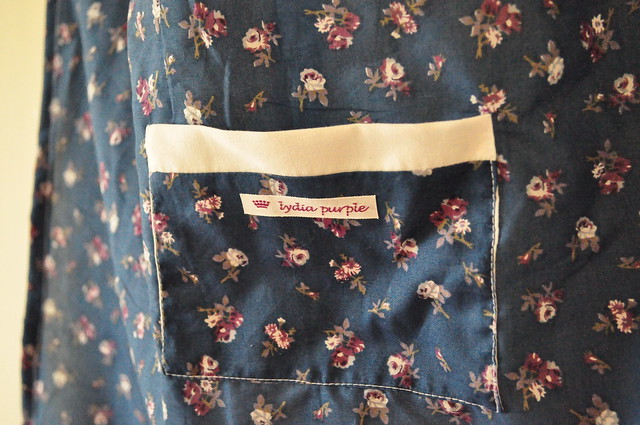
Add another smaller square of that fabric lined with white cotton for a pocket.

nursing cover

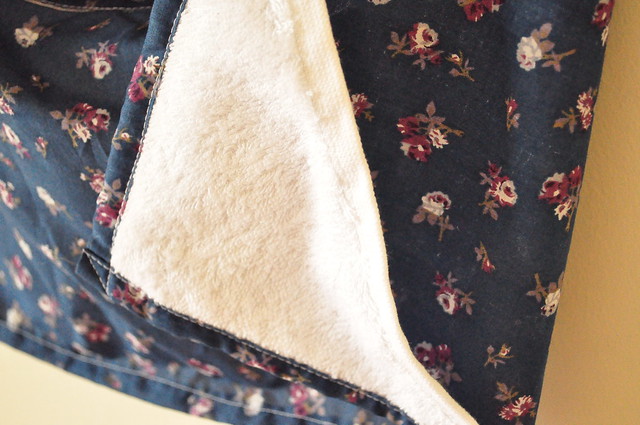
Add a triangle of terry cloth into one inner corner.

nursing cover

Add a strip of plastic inside the top hem for peeking.

nursing cover
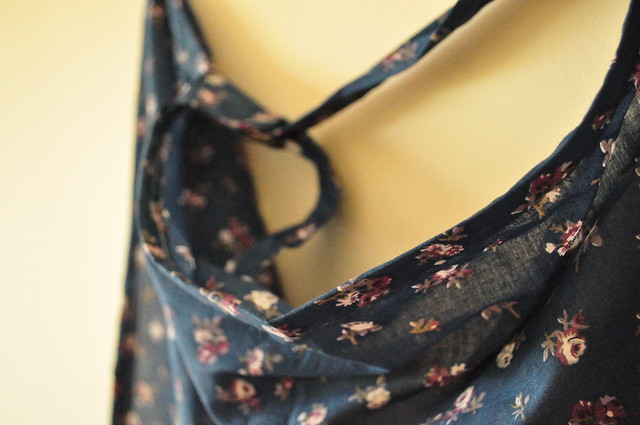
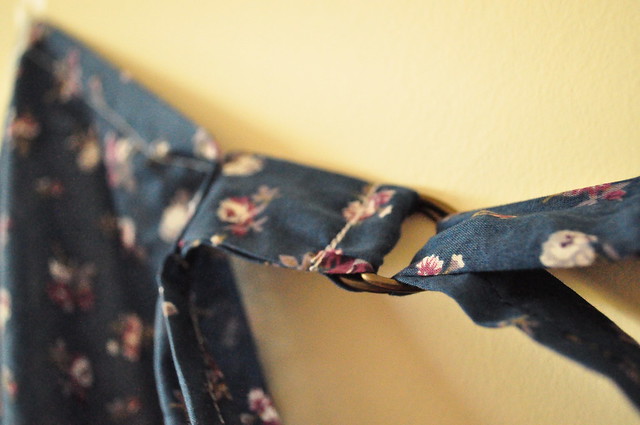
Add straps with D-rings.

nursing cover
Nursing cover done!


Thursday, August 9, 2012

A New Tote for this Mama

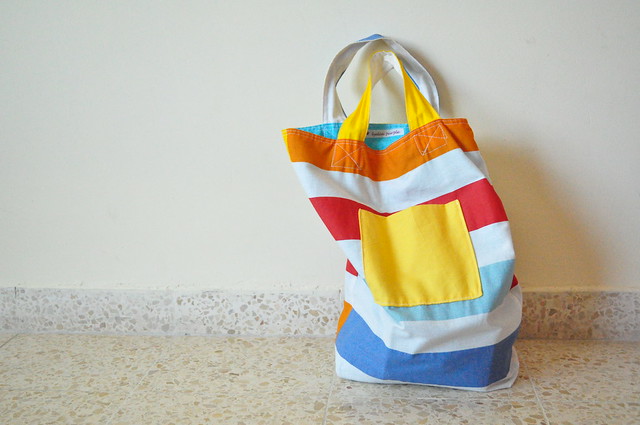
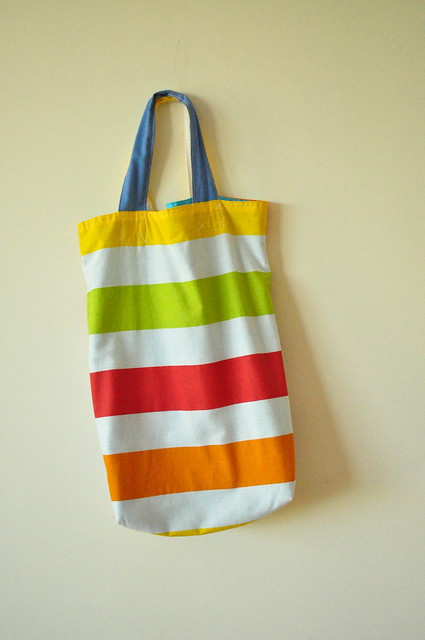
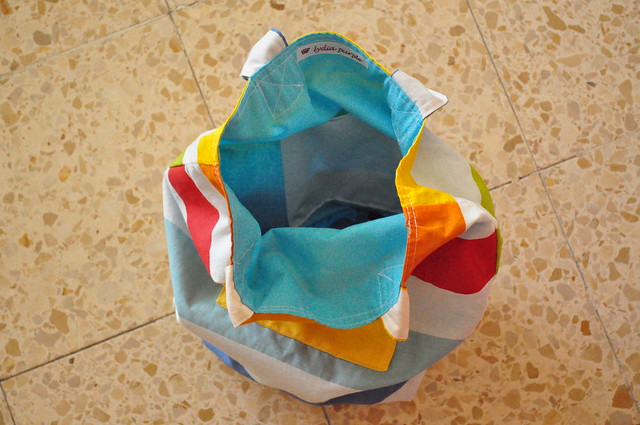
Today I am 40 weeks, 1 day. Overdue. Overdue also to blog something. That baby being late is not so bad after all, because I crossed more projects off my to-sew-list than I thought. And sneaked some new ones in, too. Like this happy summer tote. It makes me smile every time I look at it: a new bag, stripes, red, yellow, turquoise.

Summer Tote


It's made from the leftovers of IKEA Vitaminer cotton fabric that I bought for the kid's room curtains (not that I've made curtains yet, I just cut the fabric so I would have leftovers to make this bag...) Oh and YES, I felt the need for a new TOTE arise after checking out Dana's series on TOTE bags.

Summer Tote
here's the back


Summer Tote
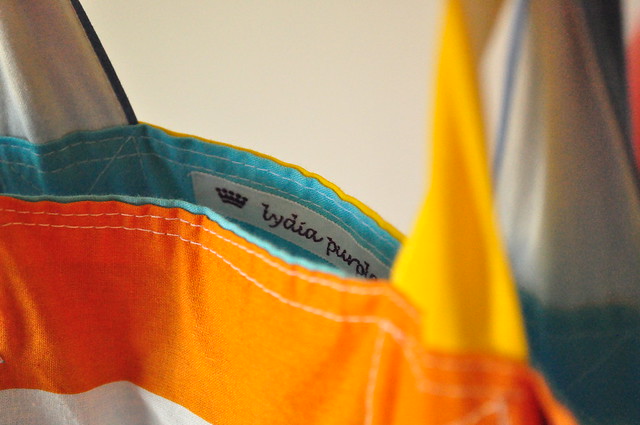
and the inside...lined and with pockets. (Technically "reversible" but who would want to hide the stripes?)


Summer Tote
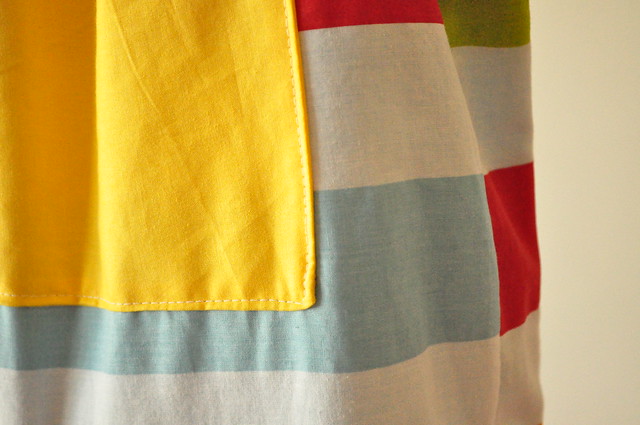
I added a pocket on the outside, too.


Summer Tote
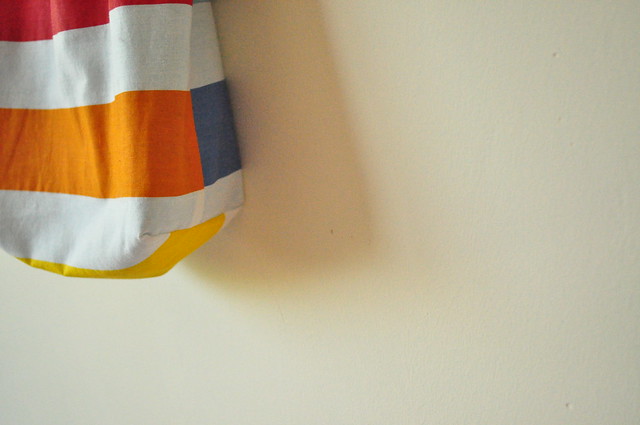
It's boxed out.


Summer Tote
orange kisses turquoise? Yes. please!.

Friday, July 20, 2012

Yesterday

Yesterday, I spend my afternoon here:

DSC_0998

I had a few hours of me-time (well as much me, as there is left with the company of a 37 week bump) and I really made the most of it. Turning the AC on, homemade ice coffee, sewing session. I moved my sewing machine to the dining room, because I have air conditioning there. The sewing room really turned into a "sweatshop" and I couldn't do it any longer...

The summer heat really got me this year, never thought that hot weather could bother me that much, but being pregnant changes just about everything, right? But the nesting energy really kicked in, the house was turned up side down, projects got finished, lots of sewing done and still in the doing. Just not much taking pictures or blogging yet. I have a ton of pregnant friends right now, so I am making lots of mommy to mommy gifts and I really think that most of the things I made will look much cuter with real babies presenting them... so wait and see!


Thursday, June 21, 2012

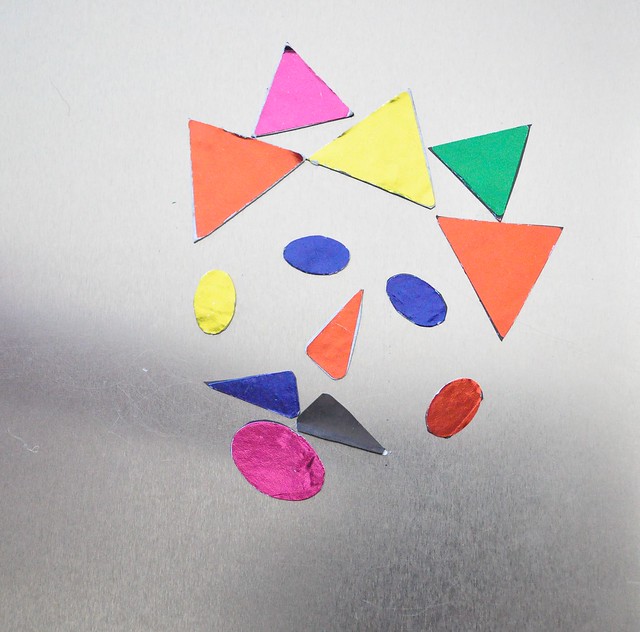
DIY Magnetic Color/Shapes Game

For a few months now my two year old daughter is really interested in colors, shapes, sizes and matching things. And Stickers, those stinkin' fun things that little people use to decorate your furniture when you're not looking. So one afternoon I pulled out my ever growing collection of free fridge magnets to make this:
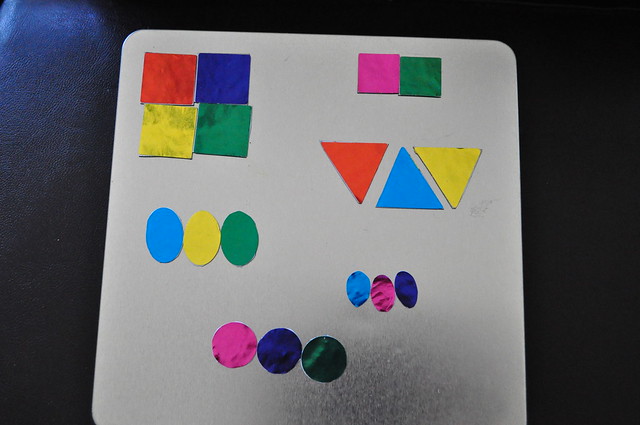
DSC_0940
A magnetic color/shape/size game box.

This is a great craft that your toddler can help with and the game will provide hours of colorful creative fun, too. Here is what you need:
-fridge magnets, the flat "pizza" or "call your electrician" advertising ones (I don't know about you but we get them on our mailbox or door all the time. I save them, for crafts like this!) If you don't have anything like this laying around there are magnet sheets available in craft stores.
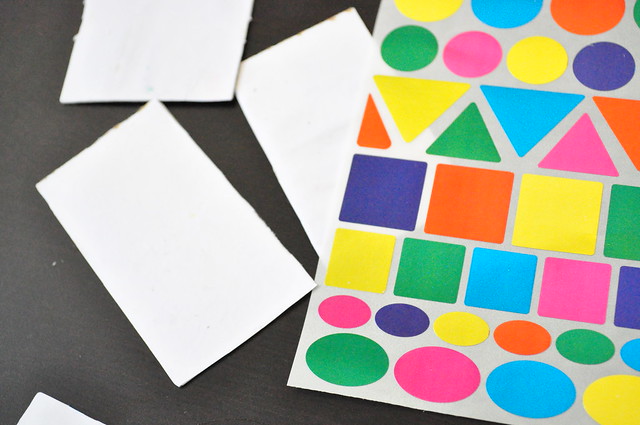
-stickers in different colors, shapes and sizes 
or alternative:
-white paper, glue and markers
-scissors
-a flat plain tin box (from chocolate or cookies, if you don't have a plain colored one you can spray paint a decorated christmas cookie tin or go buy yourself some fancy chocolate in a tin!)
or alternative:
- a fridge door (it's ok to leave it attached to you fridge)
DSC_0796
you see those two-year-old hands trying to steal the tin box to check for leftover chocolate?

DSC_0815

After you gathered all your supplies and ate all the chocolate... here is what you do:
Step 1. Pull off the advert from the magnet. Depending on the quality you'll either have several layers of white paper underneath or the whole thing will just come off and leave you with a plain black magnet. Either is fine if you use stickers (Go to step 3). If you want to draw your shapes with marker it is useful to leave the white paper on. Saves you step two.
Step 2. If the advert pulled off completely or uneven glue some white paper  to the magnet. (regular craft glue should do the job)
Step 3. Create your shapes by either sticking your shape stickers on the white side of the magnet or draw and color the shapes you like. (Both can be done by your happy crafty toddler)
Step 4. Cut out the shapes with sharp scissors.
Step 5. Play.
DSC_0799
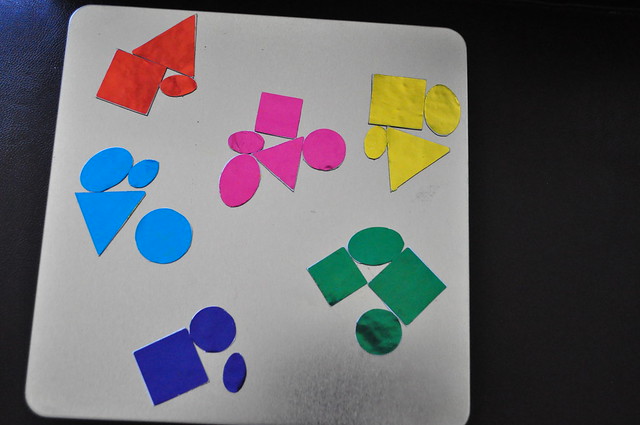
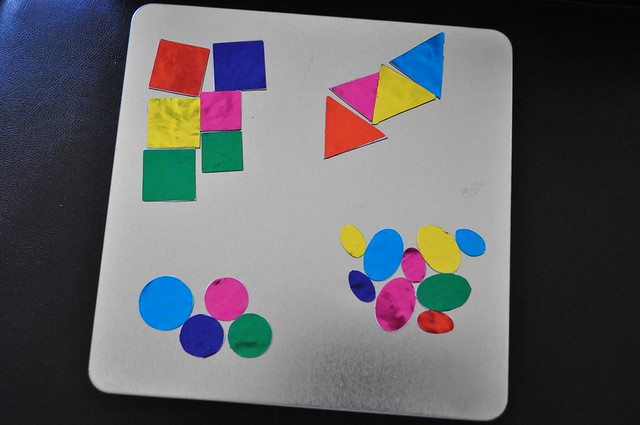
you can sort by color

DSC_0800
or shape

DSC_0801
or shape and size

DSC_0942
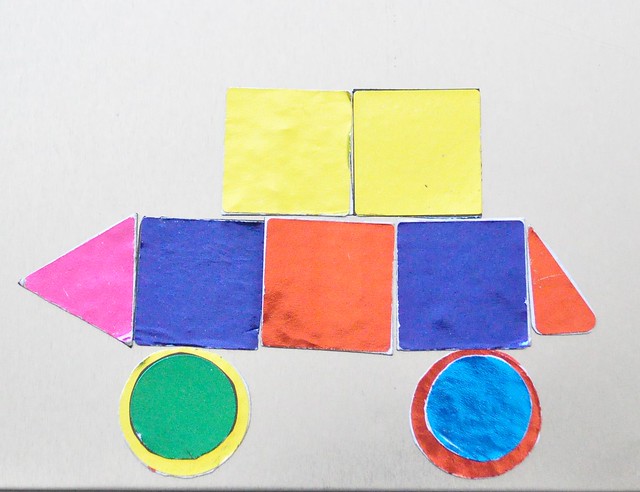
or build a car... or cities, or faces, or flowers....


It's a great activity to take with you on long car rides, because it's magnetic the pieces won't fall down all the time. As said above you can use it on the fridge or any other magnetic board or metal door around the house too, but the tin box offers you storage and take away play board in one. Plus it can easily be split up for two kids, one can use the top, one the bottom of the box as play board. So yeah to triple-greatness!

The game can easily be adjusted or extended with whatever you come up with... I am thinking to add some face features like magnetic goggly eyes and some wider variety of shapes to make up more faces (like mustaches or glasses).

Sunday, June 10, 2012

Tea Party

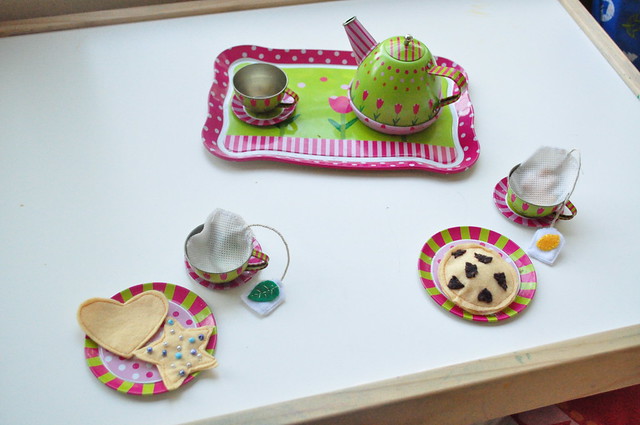
tea & cookies

I had some fun stitching going on Saturday morning... and then we had some tea parties over here.

tea & cookies

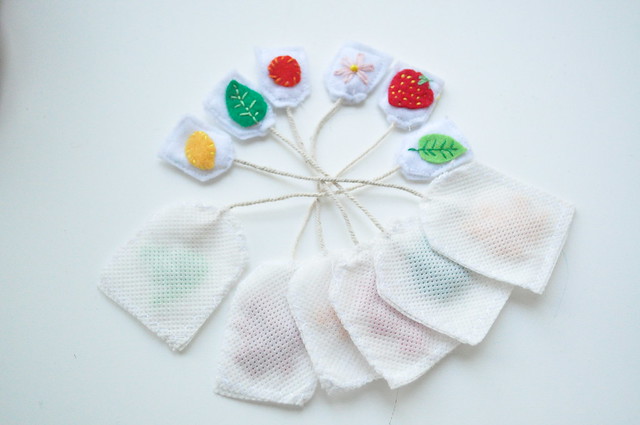
With six kinds of tea... lemon, peppermint, orange, camomile, strawberry & green tea

tea & cookies

and a jar full of delicious cookies


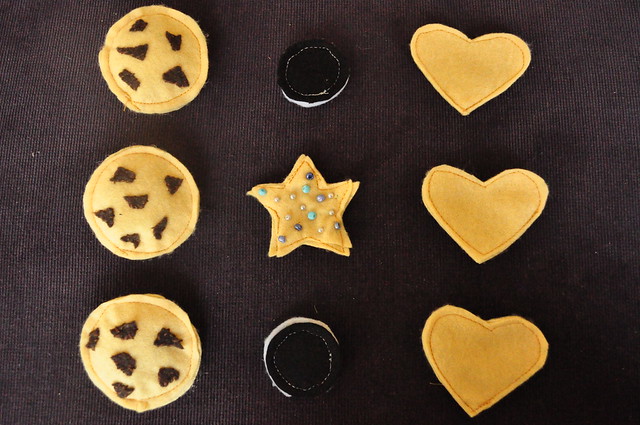
chocolate chip, Oreo's and sugar cookies. They are DE-LICIOUS! want the recipe? all you need is some felt, a bit of embroidery thread, some seed beads for the sugar pearls (if you make this for little kids you can just embroider this part with french knots) and some time! cut out cookie shapes, hand stitch the chocolate chips and sugar decor in place, machine stitch two layers of felt together and you're done. For the Oreo's I used one black layer on each side and two white felt layers for the filling.

Thursday, May 31, 2012

Week 29: Maternity Tankini (& some sewing tips)

There it is, my first homemade swimsuit. Or a maternity tankini, to be exact.

maternity swimsuit

I love how it turned out, and believe me, it was much easier than one would think. And when I knew I would have a summer pregnancy and started looking around for maternity swimsuits, I could only find really ugly or really expensive ones. And since the price for this pretty spandex fabric was 5 bucks for the meter... there was no way I would pay 100 bucks for a pretty swimsuit I would only wear 3 months max. There is nothing to be afraid of when it comes to sewing a swimsuit, and you don't even have to buy a pattern to get this fabulous look. Since it was the first time for me to make a swimsuit, I didn't think to take pictures of the whole process, so I can't offer you a step-by-step tutorial, but I'll share some stuff I learned along the way:

Cutting/Pattern:
- I used the pants of a regular swimsuit as a pattern for the new one and I used a regular stretchy tank top that still fit me at 28 weeks for the top (I only had bikinis - so no actual old swimsuit to use as a pattern for the maternity one) To make the top maternity and actually fit around the belly, I simply added a tad bit extra to the width and about 10 cm/4 inches extra length to the bottom of the front piece (see pictures below) I also made the straps wider because I like it better.
-I needed only half a meter of 120cm wide fabric for this swimsuit, but you may need more.I am pretty small as you can see.
Maternity Tankini
longer front piece and straps

Maternity Tankini
back piece, normal length

Sewing - set up:
-before actually sewing my swimsuit I cut a small pair of swim pants for my 2 year old daughter to do a little test sewing to get the feel for spandex fabric. I tried different stitches (straight, narrow zigzag) to find the best settings for my sewing machine. I used the narrow zigzag stitch with relative short stitches (2 or 2,5 I don't remember) and a 75 ball needle. I also used the build in walking foot on my Pfaff, but this is not a requirement. You can totally do it without a walking foot. The test sewing was a good thing to do because it really gave me the feel for the fabric and I learned that pinning is a good thing to do because two layers of spandex are pretty slick. If you don't have a two year old who could use a pair of swim pants, you can just use a scrap and sew a few lines with different stitches to see which will work best.

Sewing -:
-sew front and back piece of the pants together, hem all edges. You can add lining to the pants if you want to but I didn't it is just fine.
-for the top, I first sewed the straps to the front piece
-next I hemmed the bottom of the back and front piece as well as the neckline including the straps. You could do this later also.
-then I sewed a basting stitch (straight stitch, length 6) from below the bust to the bottom hem on both sides of the front piece in order to gather up the extra length around the belly area.
-next I pinned the front piece right sides together with the back piece - first pinning the upper bust area straight in place as well as the bottom hems. Than I evenly spread the gathers around the belly area and pinned them in place and sewed everything together. After everything was sewn in place I removed the basting stitches (be careful with a seam ripper on spandex) I just pulled it out by hand.
-if you want a basic halter neck  top you are done now, if you want actual straps put on the top and get somebody to pin the straps in place on the back piece. Than sew in place. I intended to have regular straps, but than I liked the halter neck version, so I ended up leaving the straps attached only to the front piece.

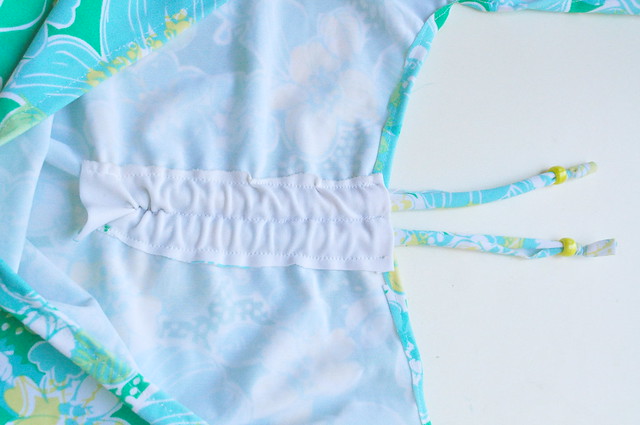
-if you like to create a ruffled bust piece (like I did) you'll need to cut an extra strip of fabric to make the cord and a rectangle about 3 x 10cm/1,5 x 4 inches. (You might need a longer rectangle if you have larger boobs and your bust piece is longer.) Fold your top to find the middle of your front piece and attach the rectangle to it with 3 straight lines - one in the middle that lines up with the center of the top and one on each long side, leave top and bottom of the rectangle open. You should have two small tunnels on the inside of your top. To create the cord just stretch a strip of spandex fabric until it rolls up. Insert the cord into the tunnels so both ends of the cord are coming out on the top (one end from each tunnel). As you can see below, I didn't sew all the way down on the middle seam, so the cord is hidden under the rectangle piece.  I added plastic beads to the ends of the cord and tied a knot just for a pretty detail. Now when you pull on both ends of the cord your bust piece should ruffle up, you can adjust this according to your liking. Pretty simple thing to do to create a cool detail on any swimsuit.
DSC_0904
the tunnel with cord


Oh, one more thing. I didn't iron at all in this project, since spandex can only be ironed on very low temperature it didn't really have a visible effect. I just pinned a lot more than usual to keep things in place while sewing hems and stuff.

Overall feeling: I loved sewing with spandex fabric, even though it seemed tricky at first. It doesn't fray, so you could easily leave raw edges if you like that (I might actually do that with a second pair of pants for this swimsuit). And it is forgiving and lovely stretchy. And just so much cheaper than buying swimsuits. Now off to spend the summer at the beach!

maternity swimsuit

Sunday, May 27, 2012

Week 27 & 28: Tiered Skirt and Simple Maternity Top


DSC_0903

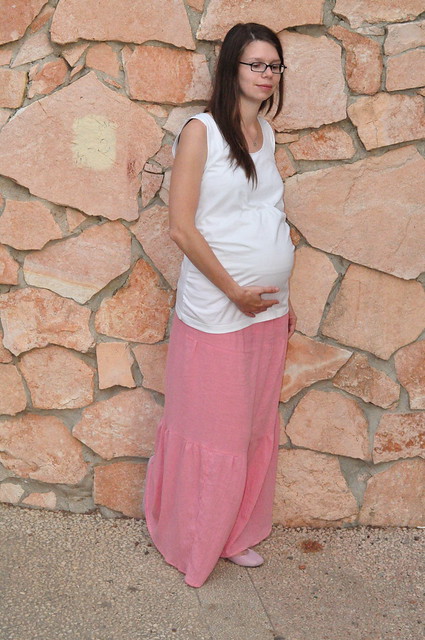
Technically I am now 29 weeks, but heck, I've been sewing a lot clothes lately (mainly because I owned hardly anything that fit me anymore...) But between sewing, wearing and washing not much photographing took place. So here two late projects... the tiered skirt in a lovely coral colored lightweight super soft fabric that is a dream to wear in the summer but not so much a dream to sew with. It's woven pretty loosely and frays like hell... if you need to use a seam ripper you might as well just cut of the seam incl. fabric with scissors. Anyways I like the skirt!
For the top I harvested some fabric from leftover XL T-shirts. I used a top that fit me for orientation but made the front piece about 10cm/4 inches longer than the back so I could ruffle it a bit for a better fit around the belly. It has still room to grow which I will need...

Tuesday, May 8, 2012

French Memo Board

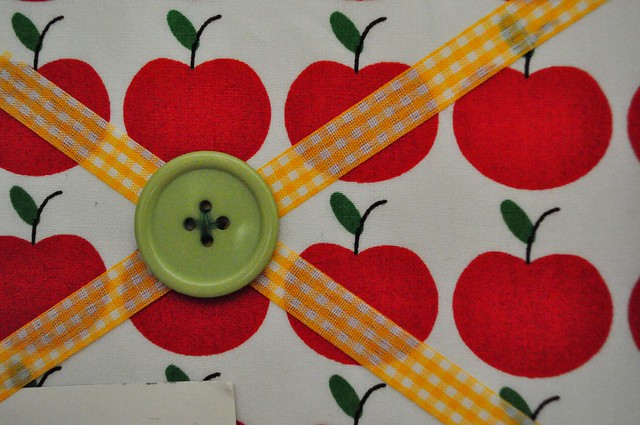
I found another use for my beautiful apple fabric that just makes me happy when I look at it: a French memo board for my kitchen. I used an old canvas, sewed two pieces of fabric together, stapled them on and added some ribbon. I hand sewed some buttons on and that's almost it... Now I finally have a place to put some of our pretty postcards and wedding invitations.
 
DSC_0810
apples, gingham and big buttons, what more could one want?
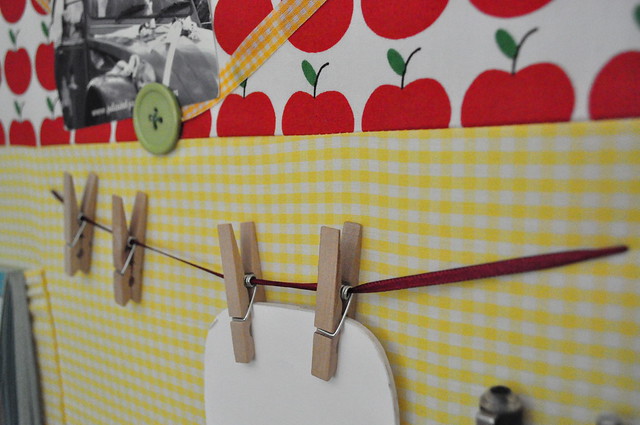
The canvas I had sitting around was quite large, so I decided to divide it up a bit and add some handy features on the bottom part that are not typically included in the French memo board.... like a "clothes line" to hold some note pad or take out menus and stuff like that. It's just a piece of ribbon with some clothes pins on it. I stitched it through the cover fabric and canvas with  a large needle and tied a knot on each side of the line on the back of the canvas.

DSC_0808
the "clothes line"

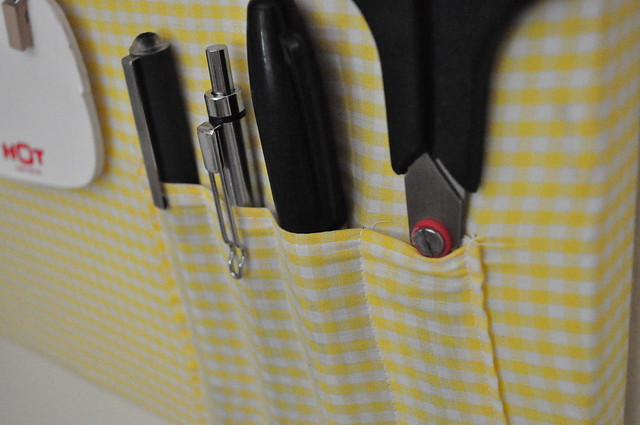
I also sewed two pockets on the gingham fabric efore stapling it to the frame, one I left as it is to hold some note paper and one I divided up in smaller sections to hold pens and scissors.


DSC_0812
some pockets sewn on to hold pens and scissors

 And that's it - my new French memo board.

DSC_0807
French memo board with some handy organizing features...


Related Posts Plugin for WordPress, Blogger...