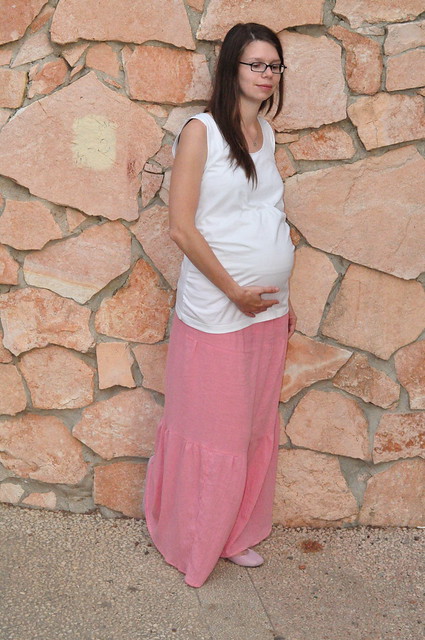
There it is, my first homemade swimsuit. Or a maternity tankini, to be exact.

I love how it turned out, and believe me, it was much easier than one would think. And when I knew I would have a summer pregnancy and started looking around for maternity swimsuits, I could only find really ugly or really expensive ones. And since the price for this pretty spandex fabric was 5 bucks for the meter... there was no way I would pay 100 bucks for a pretty swimsuit I would only wear 3 months max. There is nothing to be afraid of when it comes to sewing a swimsuit, and you don't even have to buy a pattern to get this fabulous look. Since it was the first time for me to make a swimsuit, I didn't think to take pictures of the whole process, so I can't offer you a step-by-step tutorial, but I'll share some stuff I learned along the way:
Cutting/Pattern:
- I used the pants of a regular swimsuit as a pattern for the new one and I used a regular stretchy tank top that still fit me at 28 weeks for the top (I only had bikinis - so no actual old swimsuit to use as a pattern for the maternity one) To make the top maternity and actually fit around the belly, I simply added a tad bit extra to the width and about 10 cm/4 inches extra length to the bottom of the front piece (see pictures below) I also made the straps wider because I like it better.
-I needed only half a meter of 120cm wide fabric for this swimsuit, but you may need more.I am pretty small as you can see.
 |
| longer front piece and straps |
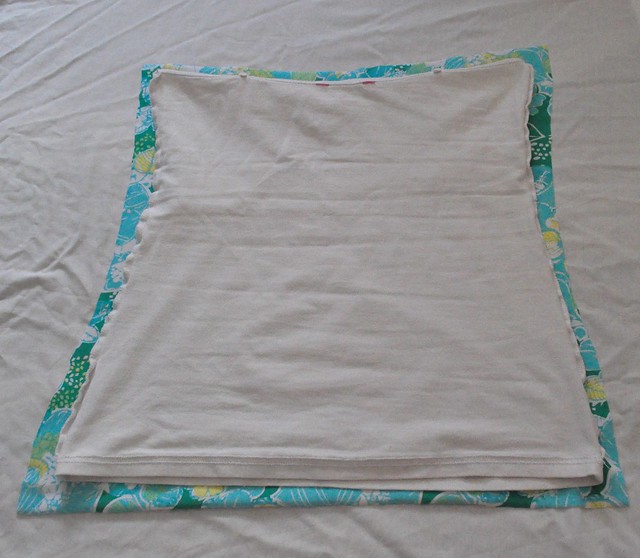 |
| back piece, normal length |
Sewing - set up:
-before actually sewing my swimsuit I cut a small pair of swim pants for my 2 year old daughter to do a little test sewing to get the feel for spandex fabric. I tried different stitches (straight, narrow zigzag) to find the best settings for my sewing machine. I used the narrow zigzag stitch with relative short stitches (2 or 2,5 I don't remember) and a 75 ball needle. I also used the build in walking foot on my Pfaff, but this is not a requirement. You can totally do it without a walking foot. The test sewing was a good thing to do because it really gave me the feel for the fabric and I learned that pinning is a good thing to do because two layers of spandex are pretty slick. If you don't have a two year old who could use a pair of swim pants, you can just use a scrap and sew a few lines with different stitches to see which will work best.
Sewing -:
-sew front and back piece of the pants together, hem all edges. You can add lining to the pants if you want to but I didn't it is just fine.
-for the top, I first sewed the straps to the front piece
-next I hemmed the bottom of the back and front piece as well as the neckline including the straps. You could do this later also.
-then I sewed a basting stitch (straight stitch, length 6) from below the bust to the bottom hem on both sides of the front piece in order to gather up the extra length around the belly area.
-next I pinned the front piece right sides together with the back piece - first pinning the upper bust area straight in place as well as the bottom hems. Than I evenly spread the gathers around the belly area and pinned them in place and sewed everything together. After everything was sewn in place I removed the basting stitches (be careful with a seam ripper on spandex) I just pulled it out by hand.
-if you want a basic halter neck top you are done now, if you want actual straps put on the top and get somebody to pin the straps in place on the back piece. Than sew in place. I intended to have regular straps, but than I liked the halter neck version, so I ended up leaving the straps attached only to the front piece.
-if you like to create a ruffled bust piece (like I did) you'll need to cut an extra strip of fabric to make the cord and a rectangle about 3 x 10cm/1,5 x 4 inches. (You might need a longer rectangle if you have larger boobs and your bust piece is longer.) Fold your top to find the middle of your front piece and attach the rectangle to it with 3 straight lines - one in the middle that lines up with the center of the top and one on each long side, leave top and bottom of the rectangle open. You should have two small tunnels on the inside of your top. To create the cord just stretch a strip of spandex fabric until it rolls up. Insert the cord into the tunnels so both ends of the cord are coming out on the top (one end from each tunnel). As you can see below, I didn't sew all the way down on the middle seam, so the cord is hidden under the rectangle piece. I added plastic beads to the ends of the cord and tied a knot just for a pretty detail. Now when you pull on both ends of the cord your bust piece should ruffle up, you can adjust this according to your liking. Pretty simple thing to do to create a cool detail on any swimsuit.
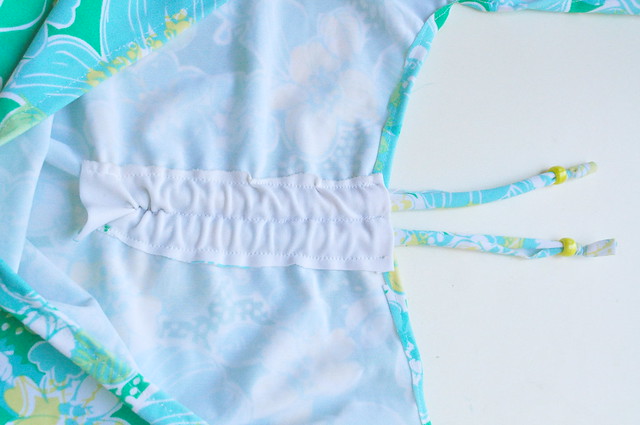 |
| the tunnel with cord |
Oh, one more thing. I didn't iron at all in this project, since spandex can only be ironed on very low temperature it didn't really have a visible effect. I just pinned a lot more than usual to keep things in place while sewing hems and stuff.
Overall feeling: I loved sewing with spandex fabric, even though it seemed tricky at first. It doesn't fray, so you could easily leave raw edges if you like that (I might actually do that with a second pair of pants for this swimsuit). And it is forgiving and lovely stretchy. And just so much cheaper than buying swimsuits. Now off to spend the summer at the beach!


