I recently read over at ikatbag about
her daughters' love for Perler beads and it brought back childhood memories. As a child I especially loved a coaster at my grandpa's house that was woven from beads the same size as Perler (or Hama or IKEA PYSSLA) but they were made form ceramic or glass, not plastic. It was a beautiful coaster. Anyways, my 2 year old loves beads at the moment and I just kept thinking of patterns for woven bead projects, so we got a box of fusible beads (and some peg boards, too) from IKEA and I started out on some simple bracelets. The weaving technique is also found on the Perler/Hama website, but there it's not well explained. So here a little tutorial. I think this craft is suitable for kids from age 6 years or older depending on craft skill level and patience ;-).
 STEP 1:
Tie a bead (I use a different kind bead so it's obvious) as a stopper to one end of your string/elastic thread).
Add 4 beads (or any
even number beads) to the string.
Note: If you use an odd number beads the pattern will not work out, there is a way to weave with an odd number, but it's a bit more difficult and can be confusing for beginners or young children. You can use any even number, for a bracelet, this will define the width of your bracelet, 4 is a pretty good size for kids arms. You can use this technique for any size projects, 12-16 beads for coasters, or even 50 beads or more for placemats.
 STEP 2:
Add another bead
and put the string through the 3rd bead of the first row.
 STEP 3:
Add one bead and put the string through the first bead of the first row.
(You can totally do Step 2&3 in one step, I just separated it for clarity, this is how the kids I did this with understood)
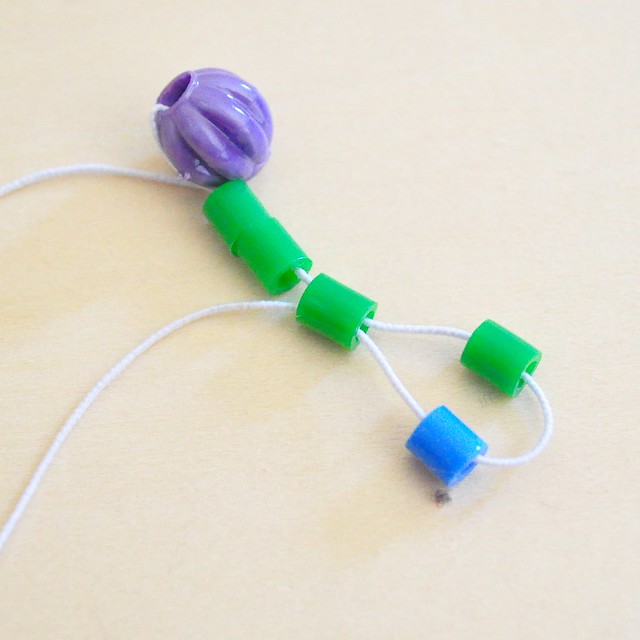
 STEP 4:
Pull tight. Now you have the basic set-up for the weave pattern.
1-2-1-2 or low-high-low-high.
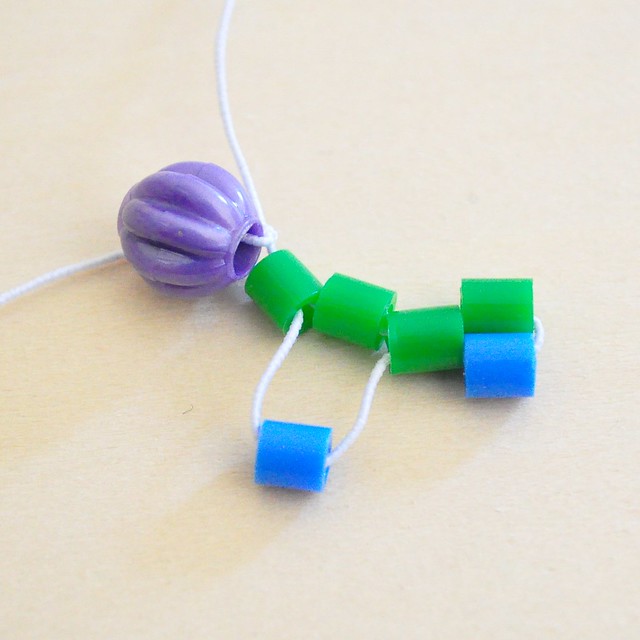
 STEP 5:
Add a new bead at the low position and pull the string through the blue bead (high) of the last row. Repeat.
Got it? Always add a bead to the low position and pull string through the high of the last row. For a 4 bead wide bracelet you will add 2 beads with each row, switching direction from left-right to right-left and back...
 TIP:
TIP:
It's much easier and quicker to do this with a needle, as you can see in the picture to the left.
You should pull tight after every row, but you can loosen up the last row a bit to make it easier to put the string through the beads, this is especially helpful if you (or your kids) do this without a needle.
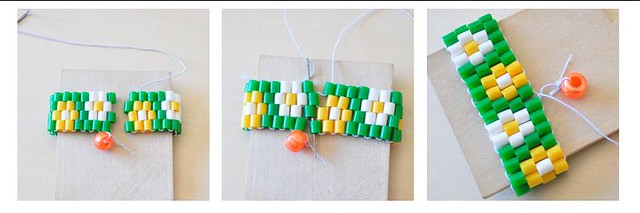
HOW TO FINISH THE BRACELET?
Once you bracelet is long enough and both ends fit together like a zipper, simply weave both ends together by going back and forth between one end and the other (see middle picture above.) Tie both ends of the elastic together, cut off the stopper bead and weave a bit of the long end back into the bracelet. you can pull and stretch the bracelet a bit so the knot will not be exposed on the side of the bracelet but hidden inside a bead.
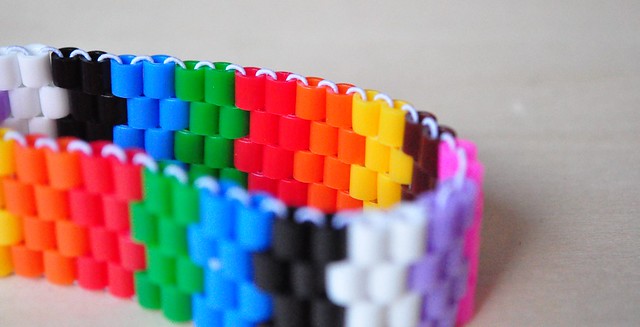
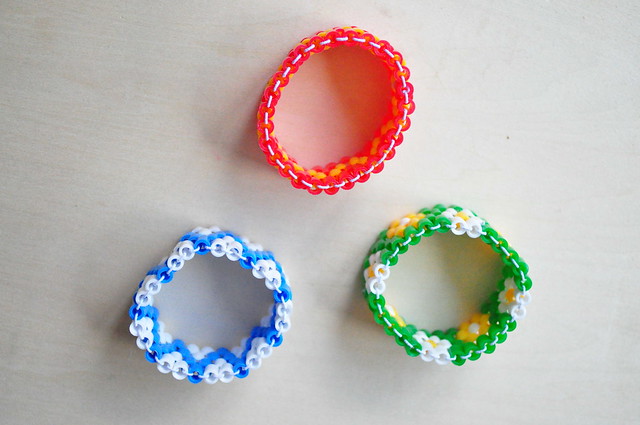
Here a few bracelets I made for my baby... patterns & more
coming soon. (Edit: Patterns for the bracelets are found
here!)